Wednesday, February 10, 2016

Greek Chicken Pita

I could seriously eat this each and every day for lunch! I promise you won't be disappointed!

Ingredients:
1 Whole Wheat Pocket Pita
3 oz Cooked Chicken Breast
1/4 Medium Tomato, chopped
1/4 Cup Chopped Cucumber
1 Tablespoon Chopped Red Onion
1/4 Teaspoon Dried Oregano
1 Tablespoon Fresh Lemon Juice
1/4 Cup Shredded Romaine Lettuce
2 Tablespoon Crumbled Feta Cheese

Directions:
1. Fill the pita halves evenly with chicken, tomato, cucumber, onion, romaine and cheese.
2. EAT UP!

Notes:
~ I like to make a batch of baked chicken on Sundays and shred it up then store it in the fridge. It makes the pitas a lot quicker to make. 
~ I also like to cut up a cucumber and tomato along with a red onion and then store it in a Tupperware container for the week. Again, the pita making process is really quick when you prep this way. (Don't add any juices to this mixture when you store it...it will make the cucumber soggy!)

Your 21 Day Fix Container Count: 1 Green, 1 1/2 Yellow, 1/2 Red & 1/2 Blue

Tuesday, February 9, 2016

Banana-Apple Muffins

My oldest daughter is out of school this week for Carnival break but my youngest daughter still goes to daycare a couple of days. Since we get a couple of days just the two of us I figured her and I could bake together. She absolutely loves helping me stir and mix everything together and then scooping it into the pan so who am I to deny the help?!

 (Isn't she just the cutest thing helping her mommy out?!)

Problem is that I did not want to make something unhealthy. It's rainy and cold here in Europe so I we are cooped up in the house all week. So I started the search and ended up at Autumn Calabrese's page. I absolutely love her and her workout programs plus I know her recipes are always pretty good so when I found this one I decided it was a must try and we already had everything on hand so even better. 
Here's the super simple recipe:

Ingredients:
1 1/2 Cup Almond Flour
1/8 Teaspoon Salt
3/4 Teaspoon Baking Soda
1 Tablespoon Melted Butter, cooled
2 Large Eggs
1 Cup Mashed Bananas (about 2)
1/2 Cup Chopped Apple (chopped into small pieces, it was 1 apple for me) 

***I used honey crisp apples because that is my family's favorite***

Directions:
1. Preheat oven to 350 degrees.
2. Combine the almond flour, salt and baking soda into a medium sized mixing bowl.
3. In a separate bowl, whisk together the butter and eggs.
4. Stir the egg mixture into the dry ingredients.
5. Stir in the bananas and fold in the apple.
6. Spoon batter into muffin cups. (Mine made 9)
7. Bake for 30-40 minutes. Watch for them to start browning. I baked mine for 30 minutes and they came out great but it depends on your oven.

My 3 year old was so excited to not only help but eat one as well!

You can also make a cream cheese frosting for them. I did not but here is Autumn's recipe for the frosting:

Ingredients:
4 oz Original Cream Cheese
1/8 Cup of Confectioners Powdered Sugar

Directions:
Blend it all together and frost the muffins once they have cooled.

Monday, February 8, 2016

Honey Sriracha Hummus

Okay, I know I am not the only one that dislikes buying hummus at the grocery store! I've honestly done it simply for the convenience and because I never found a recipe that seemed to hit the spot for my husband and I. I don't typically eat hummus unless it's with  my chicken so I like it to have a little spice to it. That's why this recipe is awesome! If you don't like a lot of spice then I suggest cutting down the amount of Sriracha because this recipe definitely has a KICK to it but it's a winner in my book! Plus....I know what's in it and I know that it's natural ingredients. 

(You like my little Sriracha heart? I did that just for Valentine's Day LOL)

Ingredients:
* 2 (14.5 ounce) Cans Garbanzo Beans, drained & rinsed
* 1/4 Cup Sriracha (less if you want less spicy)
* 1/4 Cup Olive Oil
* 2 Tablespoons Honey
* 1 Teaspoon Garlic Powder
*1/2 Teaspoon Sea Salt
* 3 Tablespoons Cold Water

Directions:
1. In a blender, add the garbanzo beans and puree until pretty smooth.
2. Add the Sriracha, olive oil and honey. Blend until smooth. Scrape down the sides.
3. Add the garlic powder and salt. Blend again. Taste and season with salt to your liking.
4. With the blender running on low, add the cold water slowly through the lid. Once all the water is in, let puree until creamy. You may need to scrape down the sides. 

I can't wait to put this on top of some chicken for Hummus Crusted Chicken this week!

Tuesday, November 3, 2015

21 Day Fix Approved...Meal Prep Made Easy

If you are like me then you are busy and it's tough to find a lot of time to meal prep. My kids may look older because they are tall but a 2 year old and a 3 year old take up most of my time...mainly separating them so they stop fighting....but still my focus can't be in the kitchen non-stop to prep food. Especially when you add a husband and a household to keep going on top of my kids. There just aren't enough hours in the day! So I have had to come up with some ways to make meal prep super easy yet 21 Day Fix approved.


My challengers have asked me to share some of those meal prep ideas with them but I also wanted to share with all of you. 

Okay, you can meal prep a BUNCH of chicken at once and it's a throw it in and forget about it kind of thing. I like to buy a whole chicken and put it in the crock-pot. You just sprinkle some seasoning (I use: 1 teaspoons paprika, 1/2 teaspoon cayenne pepper, 1 teaspoon garlic powder, 1 teaspoon dried onion, 1 1/2 teaspoon black pepper, 1 teaspoon chili flakes. You mix all those spices together in a bowl then coat the whole chicken with olive oil then sprinkle the spice mixture on top of it.) I like to cut some sweet potatoes and throw in some baby carrots in the bottom, pour some organic veggie broth to cover the veggies and then place the chicken on top then cook it on low for 6 hours. Afterwards you shred the chicken and then you have quite a few meals ready to go. They make for great lunches at work...just ask my hubby. You can also skip the veggies and just cook the chicken (no need for the veggie broth if it's just chicken) and then you have a bunch of chicken prepared for salads or tacos...really anything! You can also get 3-4 boneless, skinless chicken breasts and put them in the crock-pot. You cover them with a jar of organic salsa (or even homemade salsa which you can find the recipe to in the new Fixate cookbook) and then turn the crockpot on low for 6 hours. When it's done you shred up the chicken and you have plenty of meat for whatever you choose. Then of course if you live in Belgium then there are the Markets in each town on certain days. They have GREAT rotisserie chicken that you could buy and shred to use during the week. If you are looking to do something similar but live in the US then I suggest finding a place that uses good, no antibiotic chicken. Places like Wal-Mart do not use good chicken so please try to avoid that stuff! 


I don't typically do elaborate snacks so my prep is super easy. I make sure I cut up all my fruits and portion them out right away. You can put them in Ziploc bags to store them. However, I like to portion my snacks out with my lunch as seen in the picture below. I also boil enough eggs for the week which is super easy and quick. Honestly, the best thing you can do for your snacks is make them super simple so all your prep should be is cutting fruit or boiling the eggs. So many times people over complicate the process. 

(The pic above shows my snacks in one container and then in the bottom portion you see my salads for lunch. I use these containers but there are plenty of options to choose from.)

Don't be afraid to eat the same thing each day for most your meals! I do it! I use my dinners as my "new meal" of the day. You can even plan more portions when you cook your dinner so that you have leftovers for lunch the next day. That alleviates the pressure to prep for lunches. 

I personally do not prep my dinner items because I work from home and can cook dinner when I need to. If you are busy and work outside the home then you can always try to cook Monday night's dinner on Sunday, then you can stay a day ahead and only have to reheat the items. I do like to pre-cut my veggies if I can sneak that in at nap time or on Sunday's during meal prep. I have also used meal prep Sunday to cut and roast a week's worth of veggies using this recipe. That means all I am making for dinner is the meat and warming up the veggies. Another go to quick and easy option for prepping dinner is making a big pot of spaghetti sauce. It's easily freezable and you can make an abundance of it so then all you have to do for dinner (or even lunch) is boil up some noodles. Again, the Fixate cookbook has awesome options on using the sauce in multiple ways so that's it's fresh and new. 

I hope that these options help you to get some meal prep done in a quick way. I know that your time is precious and that when you first start out, meal prepping can take hours. I have been there! That's why I try to stick to the crock-pot for chicken, I cut my veggies and fruits, boil some eggs and portion out my salad items. 


As always, if you have questions then please don't hesitate to ask! I am here to help! If you are interested in joining one of my fitness challenges then fill the below form out and we can get you started on your journey. XoXo

Fill out my online form.
HTML Forms powered by Wufoo.

Friday, October 2, 2015

Quick & Easy Chili

Since the weather is cooling down and honestly the nights are just plain cold, I figured it was a good time to make some chili for dinner. I'm taking a college course, my kids are in school/daycare, military spouse volunteering and then of course a house to keep up; things are just too busy for a long drawn out meal. I like quick and easy meals so this chili is the perfect option. Did I mention it's also delicious and 21 Day Fix approved?!?! 


Ingredients:
  • 2 tsp. extra-virgin organic coconut oil, melted
  • 1 medium onion, chopped
  • 1 medium green bell pepper, chopped
  • 1 medium yellow bell pepper, chopped
  • 2 cloves garlic, finely chopped
  • 1 lb. 93% lean grass-fed ground beef (or 93% lean ground turkey breast)
  • 2 15 oz cans of beans, drained & rinsed (I used 1 can of northern & 1 can of black)
  • 1 15 oz can organic diced tomatoes, no salt added
  • 1 cup red wine 
  • 1 Tbsp. ground chili powder
  • 1/2 tsp. sea salt
  • 2 tsp. crushed red pepper

Directions:
  1. Heat oil in large saucepan over medium heat.
  2. Add onion and bell peppers. Cook until onion is translucent; stirring occasionally. Should be around 5 to 6 minutes.
  3. Add garlic and cook for about 1 minute; stirring occasionally. 
  4. Add meat, beans, tomatoes (with liquid), wine, chili powder, salt, and red pepper. Stir it together and bring to a boil. Once it's boiling, reduce the heat and allow it to gently boil for around 20 or so minutes; stirring occasionally. I actually let mine boil until it was done then set it on low heat until we were ready to eat. 
If you are following the 21 Day Fix meal plan then this recipe will make 6 servings and each serving will be 1/2 green, 1 yellow, 1 red and 1/2 tsp.  

I adapted this recipe from the Fixate Cookbook which you can purchase here for 101 21 Day Fix approved recipes.

Sunday, September 13, 2015

Chipotle Shrimp Tacos

When you make that dinner and your husband looks at you and says "please make this again"! I count that as a WIN...and it's super simple! 


Chipotle Shrimp:
~ 1 lb shrimp (I used peeled, de-veined shrimp)
~ 1-2 teaspoon chipotle chili powder (depending on how spicy you prefer it)
~ 1 teaspoon chili powder
~ 1 teaspoon kosher salt
~ 4 teaspoons olive oil

Directions:
Mix together the ingredients above in a ziploc bag then add shrimp and toss. Ensure all the shrimp are well coated then place in the refrigerator to marinate for at least 30 minutes.

After marinating, saute the shrimp until fully cooked then make your taco and enjoy!

We used whole wheat tortillas, homemade salsa, cheese and quinoa in our tacos. DELISH!

Tuesday, July 7, 2015

Balsamic Steak Salad

Yesterday I posted on my Facebook page about my iron-deficient anemia and how beef contains around 2.1 milligrams of iron per 3 ounces. Since I was experiencing a major headache thanks to low iron I decided to whip up this salad for a bit of relief. Like I said on my page, this isn't a fix to the problem but it did give me a bit of relief from the headache that was quickly approaching migraine status. The salad is delicious I might add! :)


Ingredients:

5-6 oz Steak
Sea Salt
Black Pepper
Garlic Powder
4 Tsp Olive Oil
1-2 Cups Spinach (or Mixed Salad Greens)
1/2 Cup Cherry Tomatoes (cut into halves)
1/2 Cup Champagne Mushrooms (cut into halves)
Balsamic Salad Dressing

Directions:

Season steak on both sides with sea salt, black pepper and garlic powder. Set aside.

Heat oil in large nonstick skillet on medium-high heat.

Add the steak to the skillet; cook on each side for 2-3 minutes, or to desired doneness. Remove the steak from the pan and keep warm in aluminum foil. 

Add the mushrooms to the pan and sauté until done. (You can add a splash of soy sauce if you desire. I do if I know my husband will be eating the mushrooms.)

Cut the steak into slices. Set aside.

Place your spinach (or mixed salad greens), tomatoes and mushrooms on your plate. Top with steak slices and drizzle with organic balsamic dressing.

***If you choose to make your own balsamic dressing then take 1/2 cup of balsamic vinegar, bring it to a boil then reduce the heat to low so it's at a low boil for 3-5 minutes, or until the vinegar thickens into a glaze.***

ENJOY!!! XoXo

Monday, June 15, 2015

Spicy Beef & Peppers (Slow Cooker)

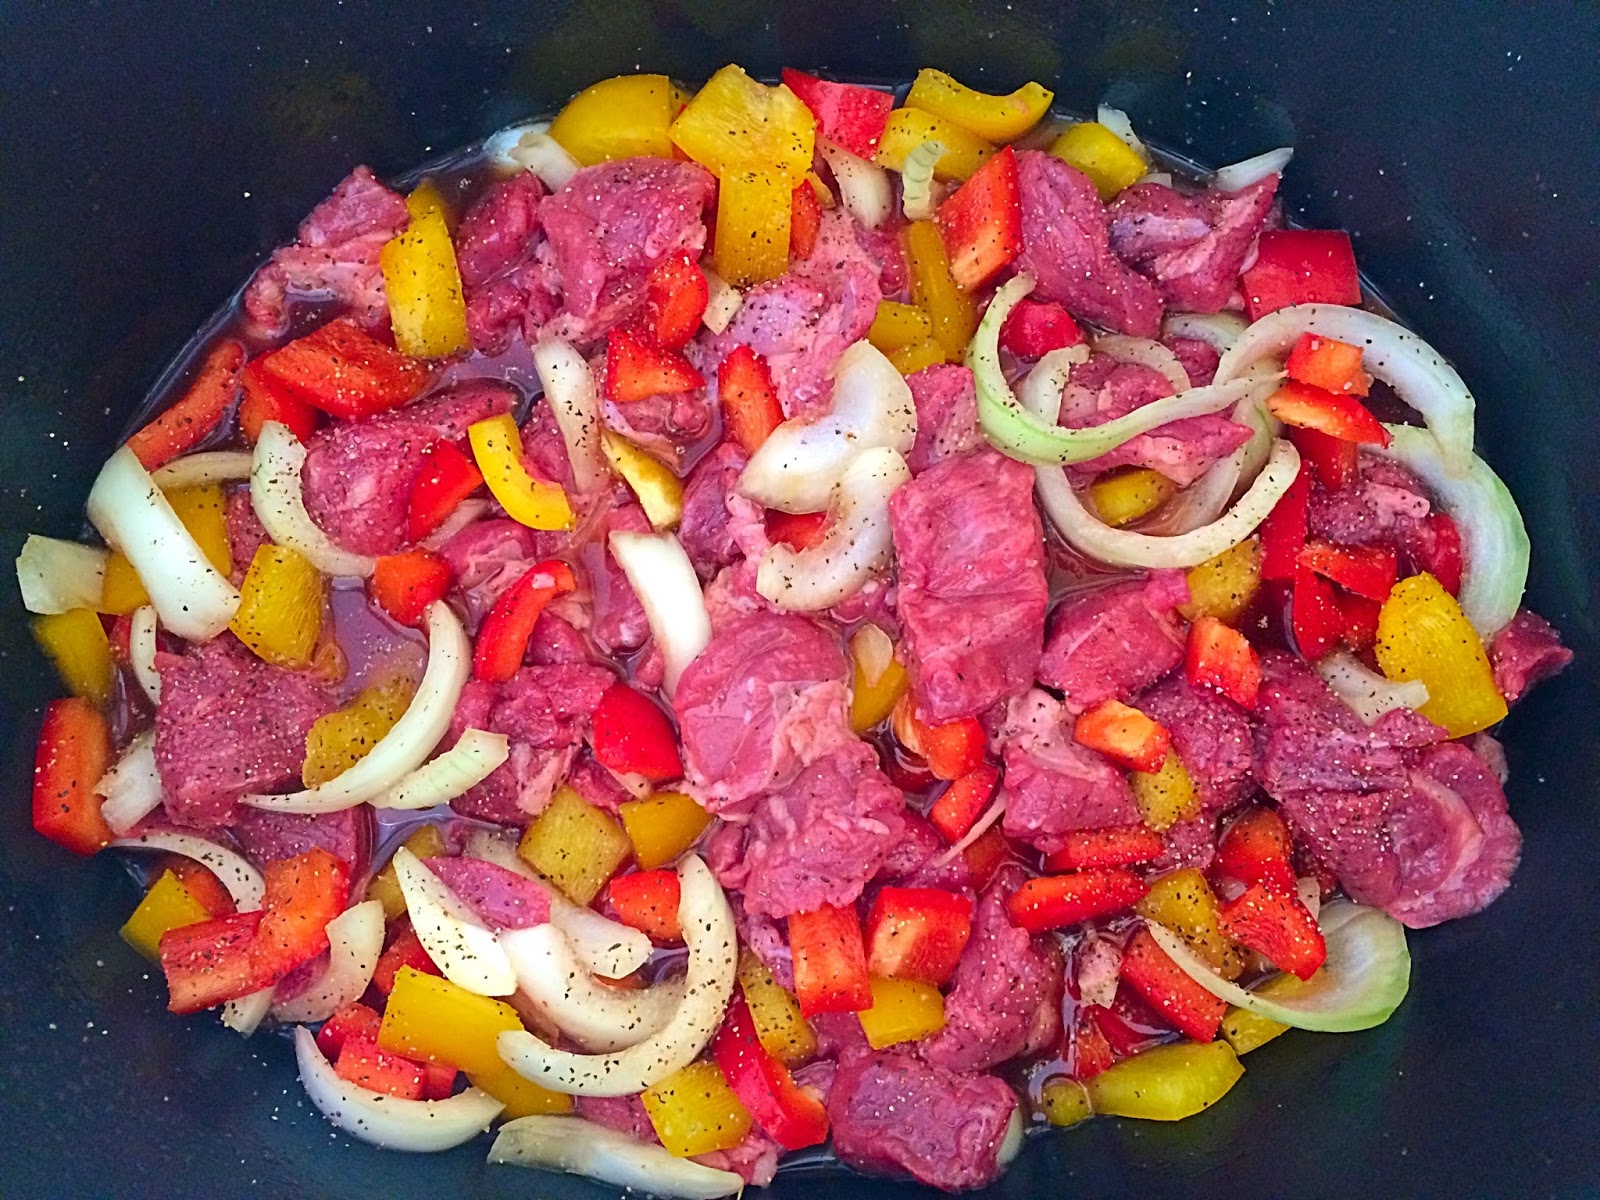
This weekend turned into a weekend at home even though we had planned to travel and see a few sites here in Europe. I think I was simply just run down after a week of very sick kiddos. I needed the rest and ultimately had NO DESIRE to cook which is when my slow cooker comes in very handy. I decided to try this recipe out for the first time and we really enjoyed it. It got the stamp of approval from my hubby so it's now on the meal plan rotation. I found the recipe on Pinterest and kind of adapted it to my nutrition guidelines but you can find the original recipe here. Give it a try this week and let me know what you think!


Ingredients: 
2 lbs beef chuck, thinly sliced
1 Red Bell Pepper, chopped into 1 inch squares
1 Yellow Bell Pepper, chopped into 1 inch squares
1/2 medium onion, peeled, cut in half, sliced
1 cup broth (I used organic, low sodium beef broth)
2 tsp garlic powder
2 tsp salt
1 tsp black pepper
1 tsp – 1 Tbsp Sriracha sauce

Directions:
  • Place the meat on the bottom of the slow cooker.
  • Top with sliced onion. For even better flavor, sauté onion in skillet until golden brown, then add it to the slow cooker.
  • Top with cut up bell pepper.
  • Sprinkle with salt, pepper and garlic powder.
  • Mix the broth with Sriracha. Pour over the peppers and beef.
  • Set on high heat for 3.5-4 hours approximately. My slow cooker works a lot fast now that we are in Europe so I only cooked mine on high for an hour then on low for another hour and it was perfect.

Serve it over rice, quinoa or you could probably even put it into a tortilla! I served mine over brown rice because again, I was being lazy this weekend LOL.

***Disclaimer - the pictures I took DO NO do this meal justice! Sorry but our light fixture in the kitchen ended up being replaced on Sunday. 

Thursday, June 11, 2015

Roasted Veggie Medley


We eat a lot of veggies in my household. Shockingly, my children like them almost as much as their mommy so that has been wonderful. It took my husband a little bit of time to come around but he actually eats them without making a face that I would expect my kiddos to make LOL. That being said, it's always hard to come up with new ways to make the veggies. I always end up sauteing them or steaming them and sometimes I just don't feel like doing that. I know, shame on me. Well I found this recipe recently on Pinterest from Family Favorite Recipes and I just HAD to try it! I am so glad I did because it was AMAZING!


Ingredients
  • 2-3 zucchini, cut lengthwise into fourths, and then slice into bite size pieces
  • 2-3 yellow squash, sliced same as zucchini
  • 1 red pepper, cut into 1" pieces
  • 1 red onion, cut into wedges
  • 1 package whole mushrooms
  • 1 garlic clove, minced
  • 1-2 Tbsp. balsamic vinegar
  • 1 Tbsp. olive oil
  • 1 Tbsp. rosemary leaves
  • 1 tsp. kosher salt

Instructions
  • Preheat oven to 450 degrees.
  • Spray a large baking sheet with cooking spray (or you can foil line the baking sheet and spray the foil).
  • Mix all of the cut up vegetables and garlic in a large bowl.
  • Add olive oil and balsamic vinegar. Toss until all the vegetables are covered.
  • Add rosemary leaves and salt, and toss again.
  • Roast the vegetables for about 30 minute, stirring once. You will know the vegetables are done when they are brown on the outside edges and tender on the inside.

Tuesday, June 2, 2015

Healthy Mushroom Pizza

I don't know about you but I LOVE pizza but my body didn't get that memo so when I eat it I am in pain for hours. As much as I love it, it's just not worth it to me. I was reminded of this fact just last night so when I was craving pizza for lunch today I had to figure out a way to have it without the pain. Now don't get me wrong, it's NOT pizza...but it's pretty darn tasty and relieved my craving. 

BONUS....it's healthy!

Just looking at them makes me what another one! :)

Here's the recipe so you can enjoy them as much as I did!

Ingredients:

4 or 5 Portobello Mushrooms
4 Tomatoes
4 Cloves of Garlic
Lemon
1 Onion
Fresh Basil
Olive Oil
Kosher Salt & Fresh Ground Pepper
Fresh Grated Parmigiano Cheese

Directions:

*Preheat the oven to 400 degrees Fahrenheit (or 205C)

* Chop the onion (I used a whole one but will probably only use 1/2 or maybe 3/4 of one next time

* Cut the tomatoes (I didn't make mine thin...I did more of a cube type)

* Chop the garlic

 * Heat up approximately 2 Tbsp of olive oil in a pan

* Saute the onion in the heated up olive oil and cook until it's lightly browned

* Once the onion is browned add in the tomatoes, garlic, and season with salt and pepper to taste. Saute the ingredients until the tomatoes are soft.

* Add a splash of lemon juice and sprinkle the fresh chopped basil (to taste)

* Spray olive oil on a baking sheet and place the mushrooms on the sheet with the bottom side up. (Make sure you clean up the mushrooms, such as taking the stem out if need be)

* Add the ingredients from the pan into each mushroom and top with grated parmigiano cheese. Place the baking sheet into the preheated oven and bake for 12 minutes. 

* ENJOY!!! :)


Wednesday, December 24, 2014

My favorite quickie meal

Last night was a little crazy around here because we have a sick 1 year old on our hands and we needed to get her to the doc before the Christmas break. Our amazing doc stayed open late to fit her in so our appointment wasn't until 5:20 pm! On top of the late appointment and stopping by the pharmacy for her meds we also needed to start putting the big Christmas gifts together for our girls. So basically I needed something quick, easy and tasty to fuel our late night work session so salmon and a salad was the best choice. Did I mention it's healthy too? 

Okay so here's what you do for the perfect salmon EVERY time. First, DO NOT preheat the oven. I know, it sounds weird and it is hard not to but I promise this works. Now, take your salmon and put it on an aluminum foil covered pan. Make sure to spray the foil with Pam, especially if your salmon has the skin on. Next, cover the salmon with a light coat of Olive Oil. Sprinkle salt, pepper and sometimes I add some lemon pepper. Once you've done that you put the pan in the cold oven, turn the oven on to 400 degrees and bake the salmon for 20-25 minutes. I served it with a nice salad last night and it was a light and healthy meal with very minimal prep time. 

I hope you enjoy it as much as my family and I do! 💗

Friday, August 15, 2014

Hummus Crusted Chicken

I posted on Facebook last night regarding what a great dinner I had made. Let me tell you...I devoured my chicken and veggies and so did my hubby! I promised everyone that I would post the recipe so here it is! Enjoy! :)


Hummus Crusted Chicken
Ingredients:
  • 2 boneless, skinless chicken breasts
  • salt and pepper
  • 1 zucchini, chopped
  • 1 medium onion, chopped
  • 1 cup hummus, homemade or store-bought
  • 1 tbsp. olive oil
  • 1 lemon
  • 1 tsp. smoked paprika or sumac
Directions:
  1. Preheat oven to 450 degrees. Prepare one large baking dish with cooking spray.
  2. In a large bowl, toss the zucchini and onion with olive oil until evenly coated. Season with salt and pepper.
  3. Place all of the vegetables on the bottom of the dish in an even layer. Lay the two chicken breasts evenly on top.
  4. Season the chicken breasts with generous pinches of salt and pepper then cover each chicken breast with the hummus so that the entire breast is covered.
  5. Squeeze the juice of half of the lemon over the chicken and vegetables.
  6. Sprinkle the pan with smoked paprika or sumac.
  7. Thinly slice the remaining lemon, and place the slices in between the chicken and vegetables if desired.
  8. Bake for about 25-30 minutes, until the chicken is cooked through and the vegetables are tender. Serve immediately.
The original recipe was posted at  http://inspiredcraftideas.com/hummus-crusted-chicken/
***Please note that I altered the original recipe to best fit my family and as always, I encourage you to do the same.

BLOG DESIGN BY ACM DESIGN STUDIO // POWERED BY BLOGGER